How to create a "view-only" wallet for our cold storage

Let's hypothesize we arranged our super secure cold storage to "hodl" cryptos until they get to the moon, maybe using one of our tools like dicetracker or dice2seed! It could be very useful to be able to monitor our addresses, not only to see how we are getting to the moon but also to be sure that our funds are safe and our cold storage is working properly. To do that, of course, we could take note of our public addresses and check them periodically on some block explorer. We can find a lot of them in Firefox's bookmarks in AnuBitux. To perform this task in a better way, we could arrange a view-only wallet, a wallet that is only able to see what's going on with our addresses but does not know our private keys so that it will be unable to sign transactions and spend our funds.
Never send or request funds to addresses that are in our view-only wallets if we are not sure to be able to access the corresponding private keys!
Bitcoin watching-only wallet
With Bitcoin addresses, one of the best tools to arrange a watching-only wallet is Electrum. We could arrange it using public addresses or master public keys, depending on how we created our cold storage.
OPSEC TIP: wallets like the ones proposed in this post are called SPV wallets. They use other's nodes to check our balances. If available, we should set up our clients to connect only to trusted nodes (we will discuss it in further posts, keep following us).
Public addresses
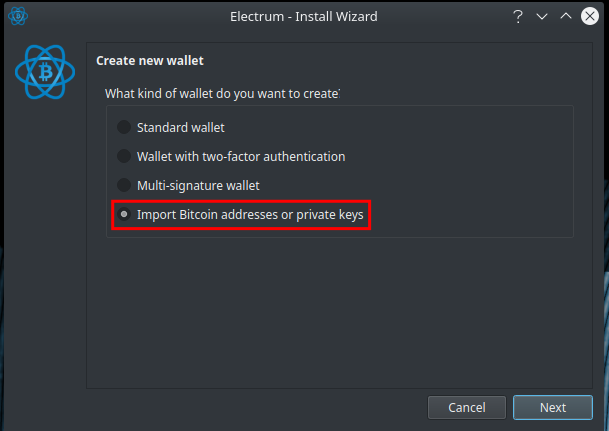
In the first case, let's hypothesize we took note of our public addresses and would like to monitor them comfortably through Electrum. To do that let's start Electrum from the Wallets menu in AnuBitux and create a new wallet, selecting the "Import Bitcoin addresses or private keys" option.
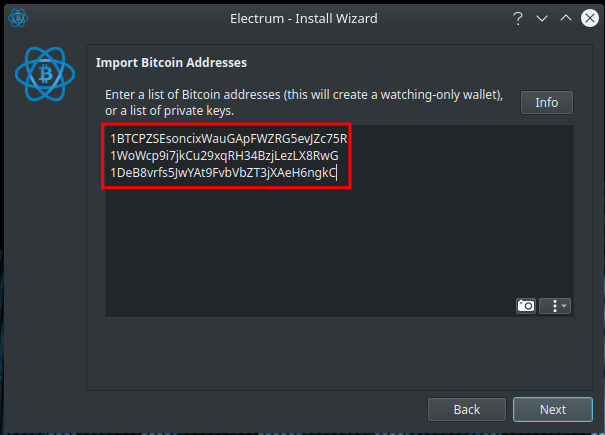
In the next step, we can type or paste our public addresses in the proper box.
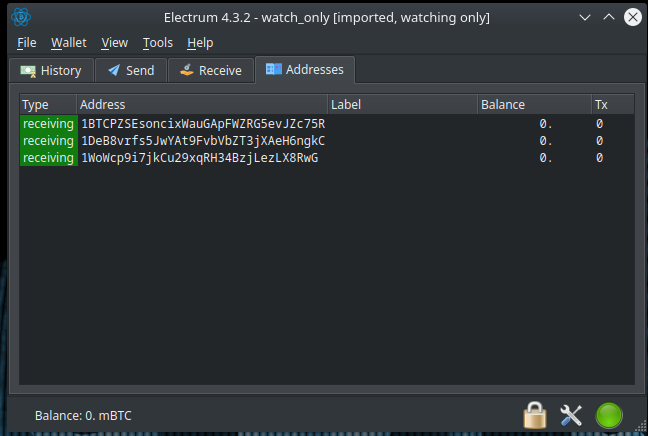
Now, clicking on next, we can provide a password and then we will have our watching-only wallet.
Electrum Master Public Key
If we created our seed using Electrum, maybe using the advanced feature to obtain a 24 words mnemonic seed phrase, we could obtain our master public key and use it to set up a new watching-only wallet. Using master keys allows us to create hierarchical deterministic (HD) watching-only wallets. With this kind of wallet, we are able to obtain all the same addresses that we could obtain in our main wallet, related to our mnemonic seed. It could also be very useful if we want to be able to receive transactions on many different public addresses, obtaining them without the need to access our cold storage and keep our private keys safe.
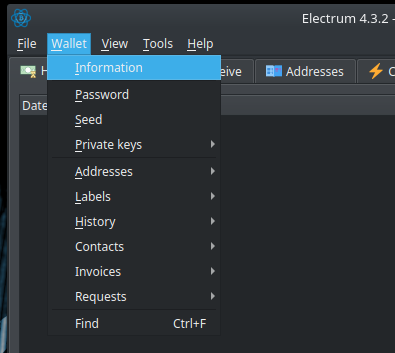
To obtain our master public key, we only have to go to the Wallet menu and click on Information.
In the next window we will see a lot of information about our wallet, like our Master Public Key.
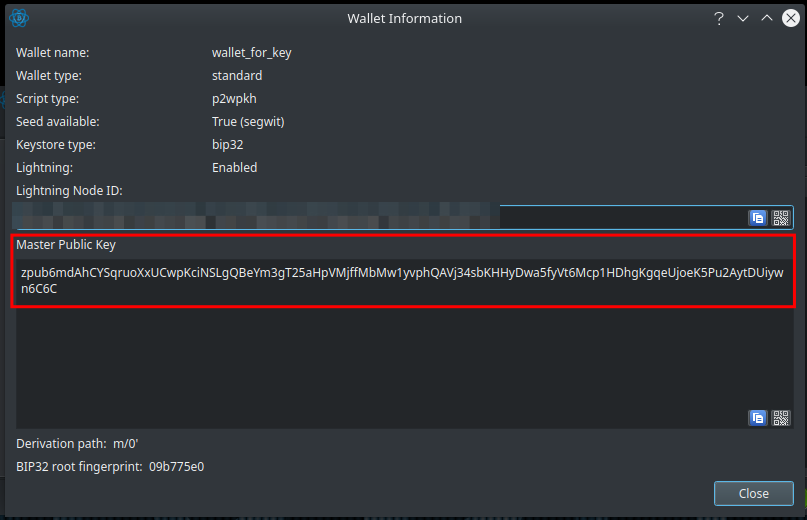
Let's take note of it and let's create a new Standard wallet.
OPSEC TIP: It could be a good idea to access our wallet only in AnuBitux live and offline, extract our Master Public Key and use it to create our watching-only wallet in a separate working environment that we will connect to the Internet.
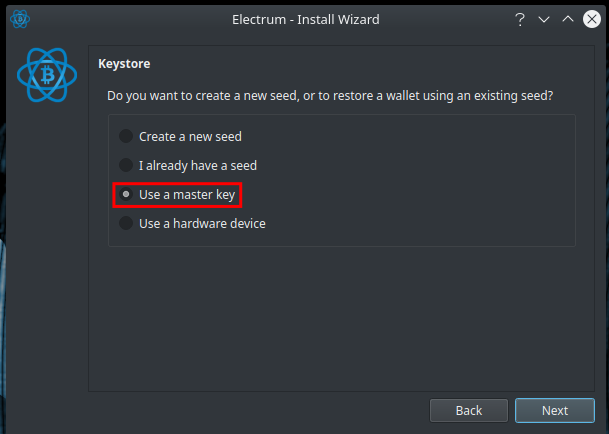
In the second step of the creation wizard, we have to choose the "Use a Master Key" option.
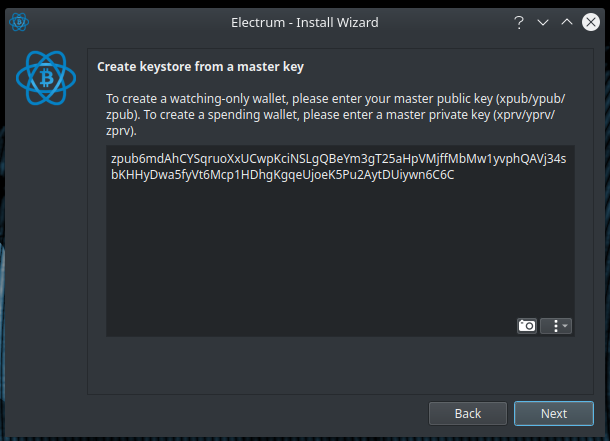
Now we only have to type or paste the Master Public Key and we have set up our watch-only wallet.
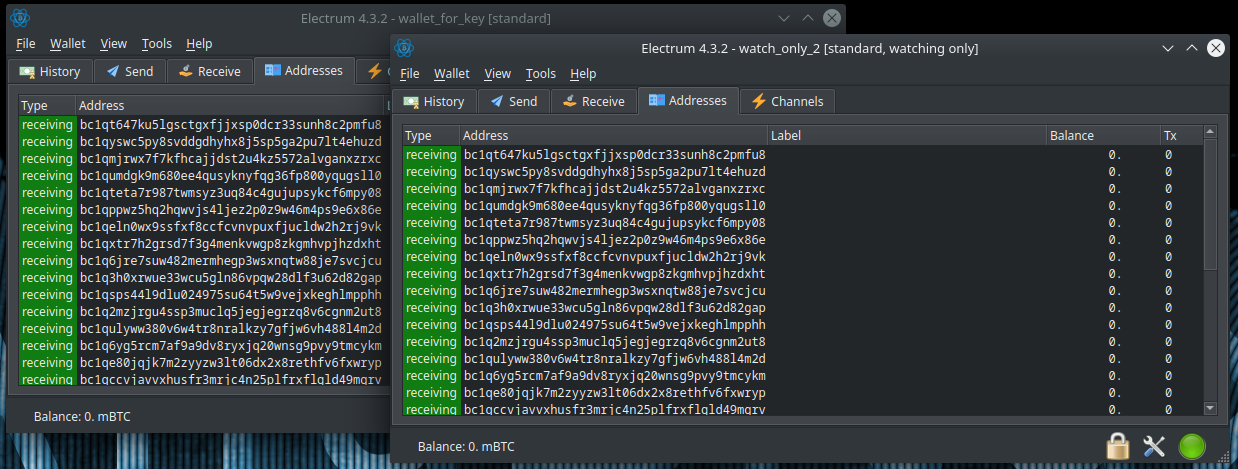
As we can see in the following screenshot, we obtained the same addresses in both wallets, with the difference that only one of them would be able to spend the funds we could receive.
Master Public Key
Let's now hypothesize we want to create a watch-only wallet related to a BIP39 seed. To obtain the Master Public Key we could import our BIP39 seed creating a new Electrum wallet, taking care to specify the right derivation path, and obtain it with the same steps we have seen above, or we could use the Ian Coleman BIP39 tool.
Typing the seed in the proper box and selecting the desired derivation path, we will obtain the addresses and the private keys that could be derived from that seed and also many master keys. We are interested in the one named "Account Extended Public Key".
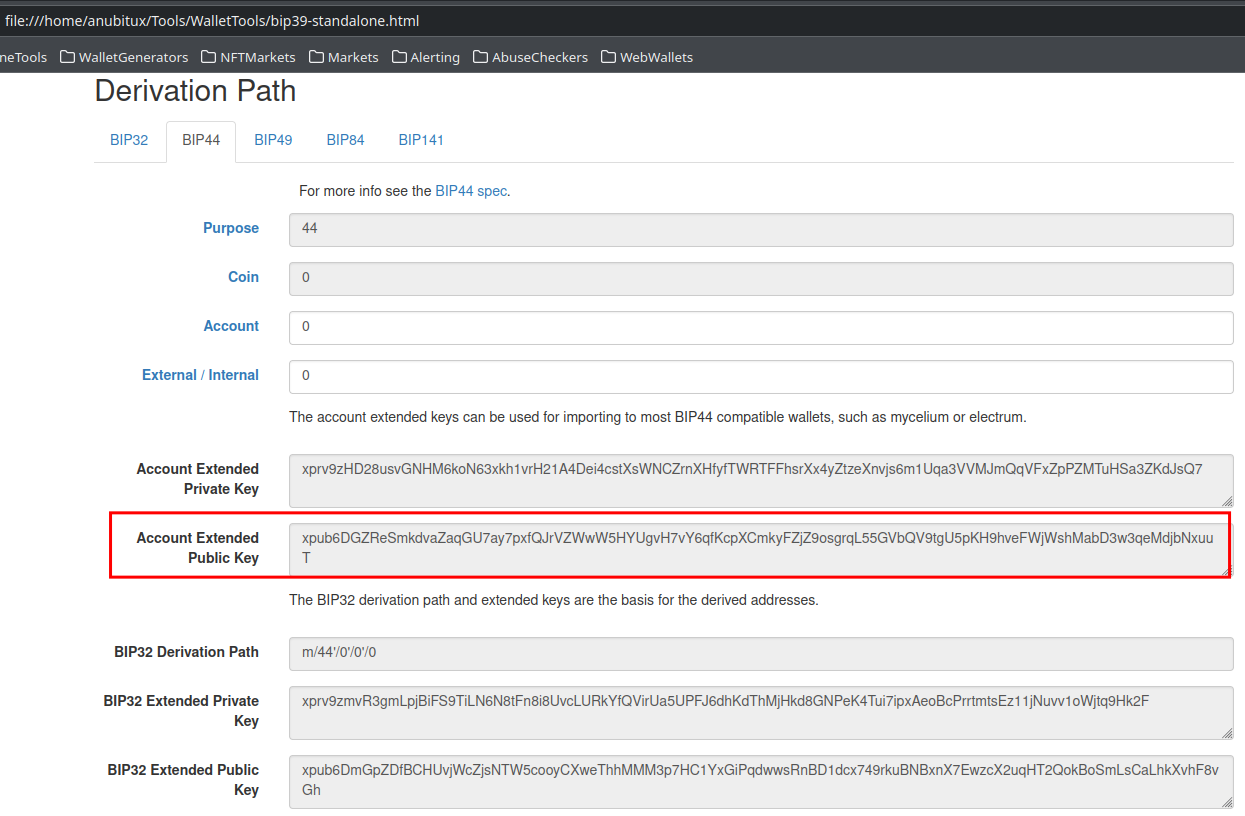
Do not use the "BIP32 Extended Public Key" since it will show different addresses and sending transactions to them could give us some trouble accessing our funds (do not worry, it can be done with the "BIP32 Extended Private Key").
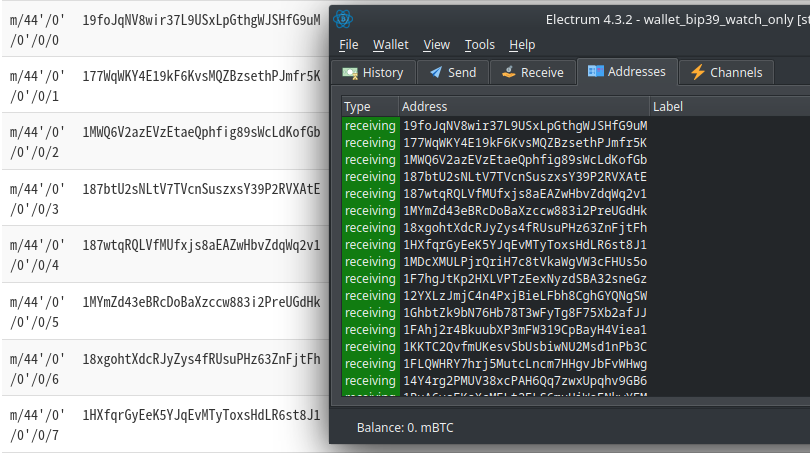
To confirm that the Master Public Key we have chosen is the right one, we can compare the obtained addresses.
Monero view-only wallet
As stated in other posts, Monero works with two kinds of private keys, a private spend key to sign transactions and a private view key to view information about our addresses since with Monero we can't check information about public addresses as we are used to do with Bitcoin and other cryptos. The private view key is the one we are going to use to set up our watch-only wallets.
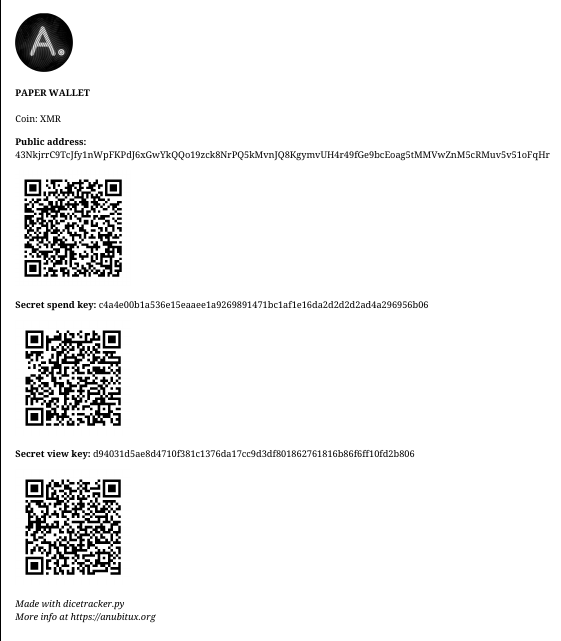
For the following examples we are going to use a Monero Paper Wallet generated with our tool dicetracker.
Feather wallet
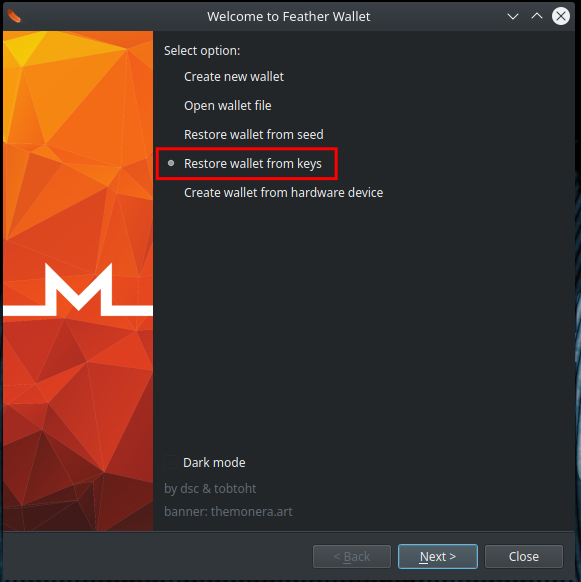
To set up a watch-only wallet with Feather Wallet, we have to start the wallet creation wizard and select the "Restore wallet from keys" option.
In the next step we have to provide the Primary address and the Secret view Key. The tool itself gives us the tip to not insert the Secret spend key if we are creating a view-only wallet.
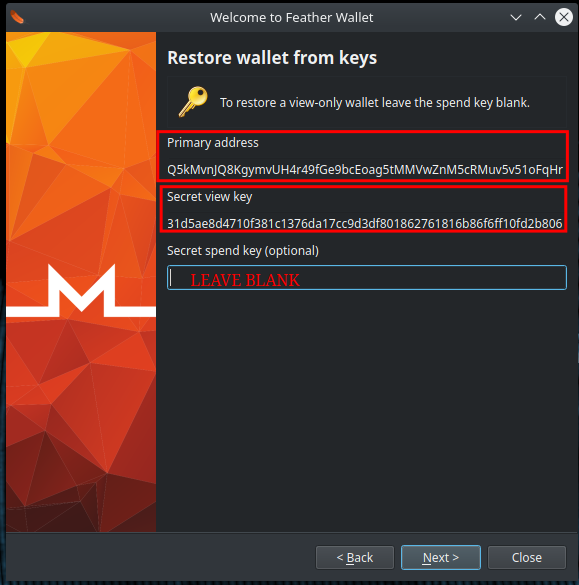
Now we only have to provide the wallet creation date and a password and our watch-only wallet is ready. If we are not sure about the wallet creation date, we can provide a date we are sure is earlier than it, unless so the wallet could not scan some blocks including transactions that we could be interested in.
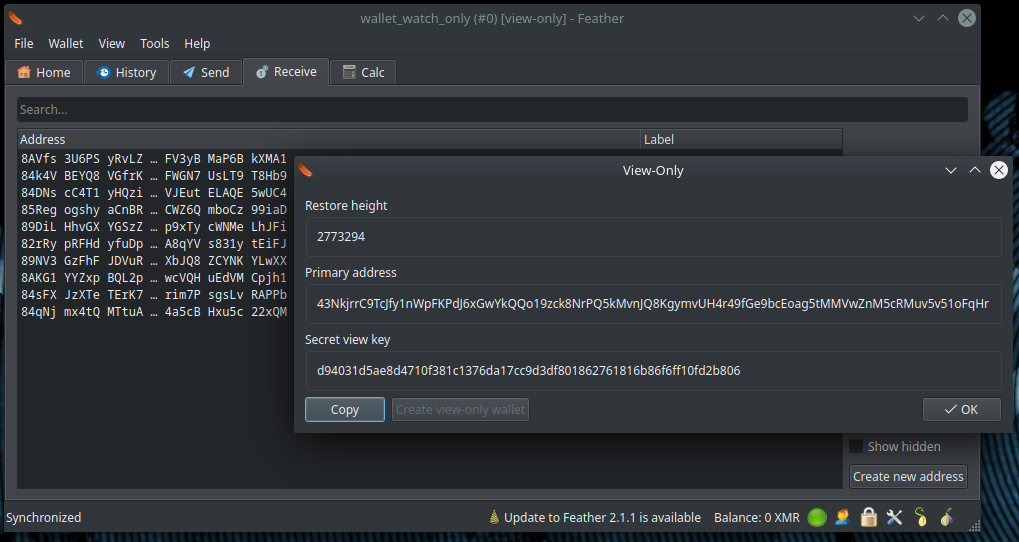
Monero CLI
To create a view-only wallet using the Monero official command line interface wallet, we have to start it with the --generate-from-view-key option followed by the name we are giving to our watch-only wallet. In AnuBitux you can type:
Tools/AddressGen/monero-x86_64-linux-gnu-v0.18.1.2/monero-wallet-cli --generate-from-view-key wallet_name

With commands like balance and wallet_info we can obtain some information about our wallet.
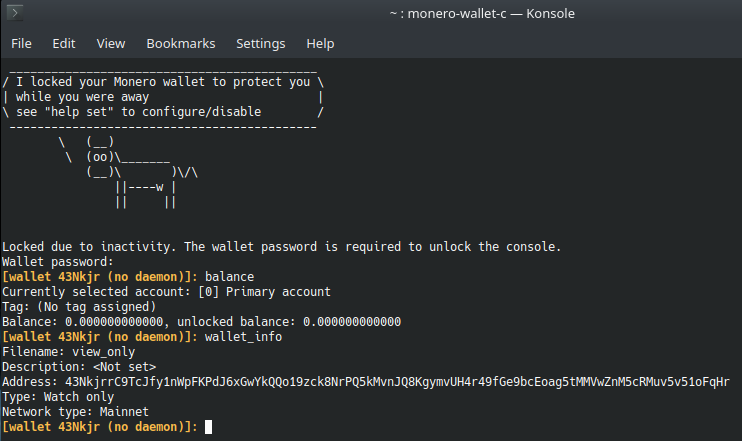
And with commands like address all and address new we will obtain addresses we could share to request transactions.

Ethereum view-only wallet
To obtain a view-only wallet with Ethereum we could use MyCrypto, which can be started from the AnuBitux Wallets menu, and a public address we obtained previously with any desired method.
To obtain our view-only wallet, we only have to start MyCrypto, click on the "View & Send" button on the left of the screen and then click on the
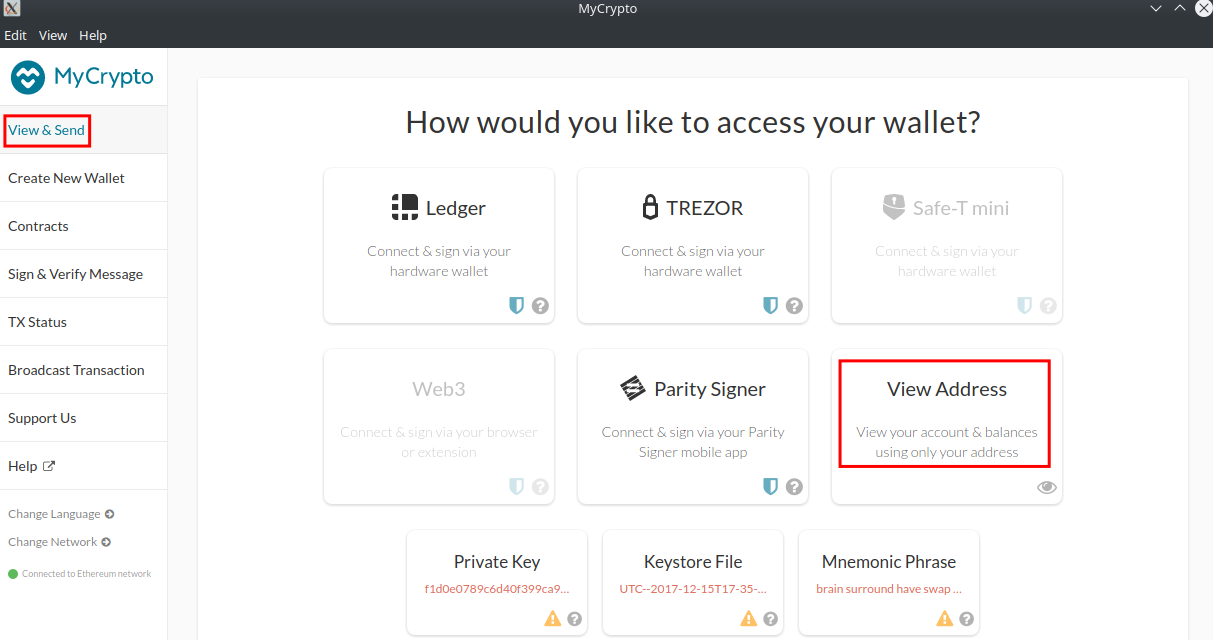
Now we only have to type or paste our address and our view-only wallet is ready to be used.
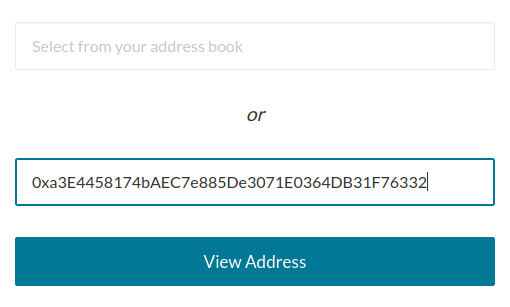
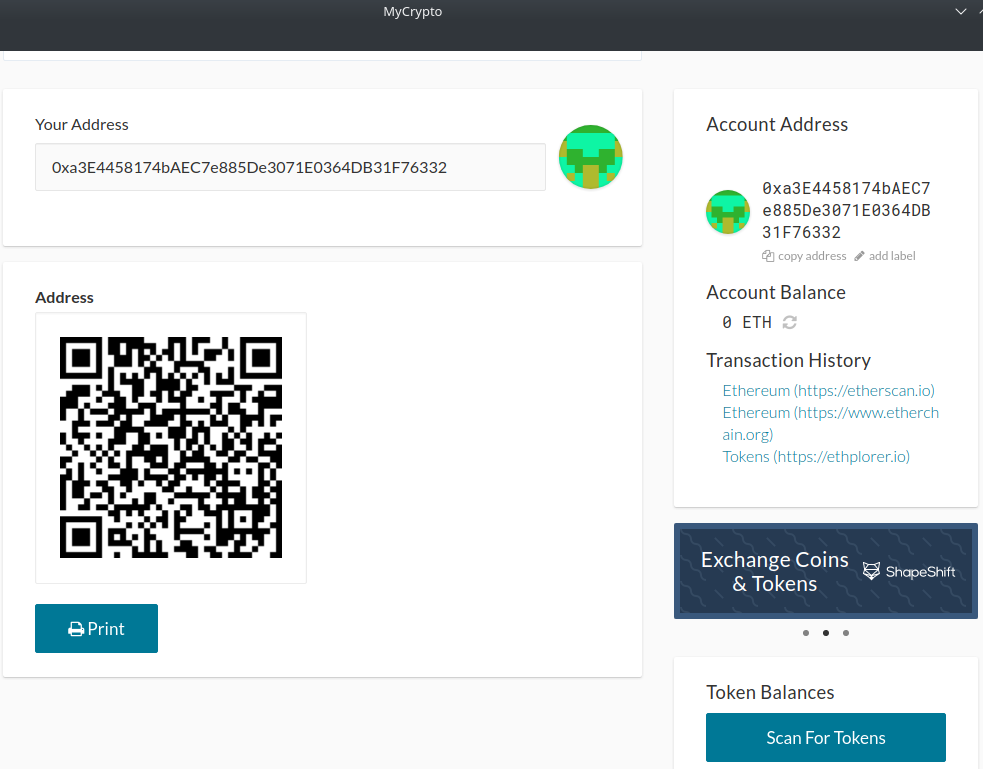
In this way we can easily monitor our Ethereum account, even for token transactions, without exposing our private keys or our mnemonic seeds.
Final thoughts
Using view-only wallets allows us to manage and monitor our addresses without exposing our private keys unless we need to dispose transactions. It is a very useful feature of many software wallets that we should consider if we are not doing transactions on a regular basis. We only have to remember that obtaining master public keys implies that we are handling our private keys or our seed and this operation has to be done very carefully, to avoid any risk concerning the safety of our funds.

