
AnuBitux and Python virtual environments

When coding with Python, one of the bigger matters we have to deal with its dependencies. With a community as big as Python's one, this problem couldn't remain unsolved! In fact, we can use virtual environments, a solution that allows us to execute every Python script with its own version of the libraries it uses. This helps us to avoid conflicts between scripts needing different versions of the same library or between incompatible libraries.
How virtual environments work
First of all, we need to install Python virtual environments to be able to use them. To do that we can simply run:
pip3 install venv
Now, when we write a Python script or download some from GitHub, like one of ours, we can open our Terminal and change the working directory with the path of the tool:
cd /home/anubitux/Tools/python_tool
Now, let's create our virtual environment:
virtualenv demo
This is going to create a python virtual environment named "demo", that will be placed in a newly created folder in the tool's directory.
At this point, we need to activate it, and all the libraries we are going to install will only be used within our virtual environment:
source demo/bin/activate
Now, to be sure our virtual environment is active, we can see its name in brackets on the left of our username in our terminal.

Now we can install our libraries, running
pip3 -r install requirements.txt
if the tool we are going to use has a list of dependencies placed in the conventional requirements.txt file, or simply running
pip3 install python_library_name
When our environment is ready, we can run our tool:
python3 demo_tool.py
If we are done, we can stop our virtual environment running:
deactivate
So the virtual environment's name in brackets will disappear.
How AnuBitux uses virtual environments
AnuBitux uses many different Python tools, some of them developed by our team, some of them developed by other trusted developers. Of course, our users wouldn't feel comfortable activating a different virtual environment every time they need to run a Python tool. So we adopted a solution suggested by our friends from the Tsurugi Linux team.
First of all, we created an environment for every single tool, with the procedure shown above. Then, to make sure that our tool is going to use it without the need to activate it, we placed its directory in the first commented line of every tool. This is the way to specify for every tool where it has to take the libraries it is going to use.
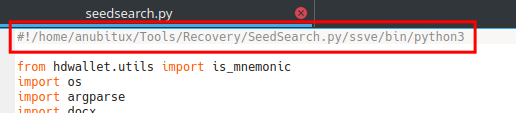
in the example, ssve is the name we gave to the virtual environment.
It is important to indicate python3 at the end of the line. This way we will be able to launch the tool without the need to specify it in the Terminal.
Doing that, it could happen that a python3 file is not available in the virtual environment folder. If so, we can place a symbolic link into it pointing to /usr/bin/python3.
Now, to be able to run the tool without the need to go to its directory, using root privileges we'll add a symbolic link to it in a directory that is included in the $PATH system variable, like /usr/bin. The $PATH system variable controls where our system is going to look for the commands we enter in our Terminal.
sudo ln -s demo_tool.py /usr/bin/
Finally we need to add the execution rights to the symbolic link:
sudo chmod +x /usr/bin/demo_tool.py
Now, after restarting our Terminal, we will be able to run our tools as all the other commands we are used to!
Something to pay attention to
A lot of python tools do not use only libraries, but also some files placed in their folder. When launching them from our Terminal in any working directory, they won't be able to find those files. To solve this, we need to add a line to our python tool that makes its process run in the correct directory:
os.chdir('/path/of/the/tool')