
How to use AnuBitux

This post refers to the first version of AnuBitux, distributed before the 31th december 2022. Consider it only if you are using an AnuBitux version downloaded prior to that date.
On the web there is a lot of tutorials about how to use iso files containing Linux distributions or about how to import a virtual appliance in softwares like VirtualBox, so, here's another one. Of course, users may use any preferred and known solutions. These are only suggestions diirected to those who are not used to this type of files.
After you have downloaded the preferred version of AnuBitux, please refer to the corresponding section of this page to start using it.
AnuBitux Live
This is the main version of the AnuBitux distro, designed to provide a safe environment and leave no traces on the devices used to run it. To use it, you'll need a USB stick and a software to flash the .iso file on it and make it bootable. For this purpose, we suggest Balena Etcher which works on any kind of operative system, but there are many different solutions like Rufus for Windows or UNetbootin for different OSes.
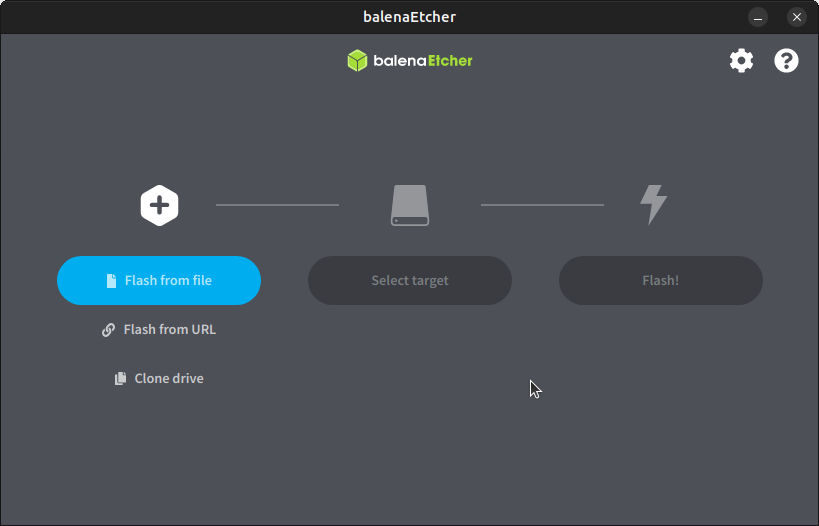
When using Balena Etcher, there is a very easy wizard to follow.
First of all plug in your USB stick and then click on the Flash from file" and select the .iso file you want to have on your USB stick.
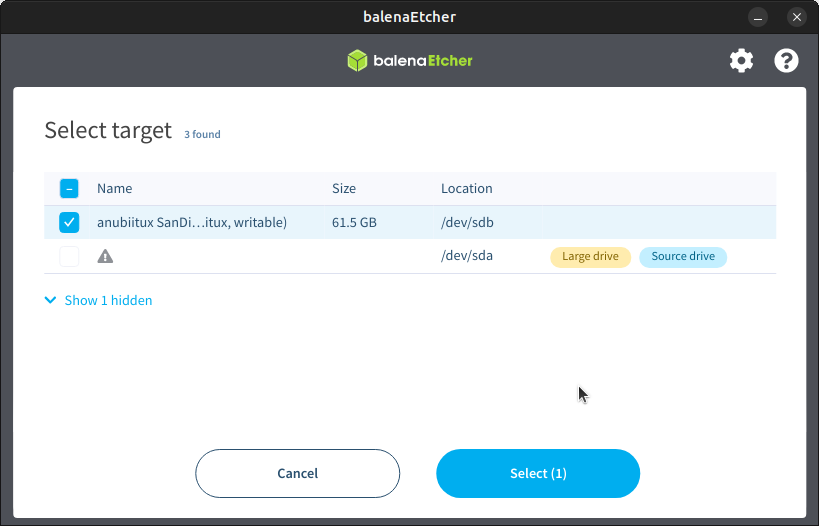
Then click on the "Select target" button and choose your USB stick. Do not forget that this process will overwrite all the content of the used drive, so, if needed, backup your files before completing this process.
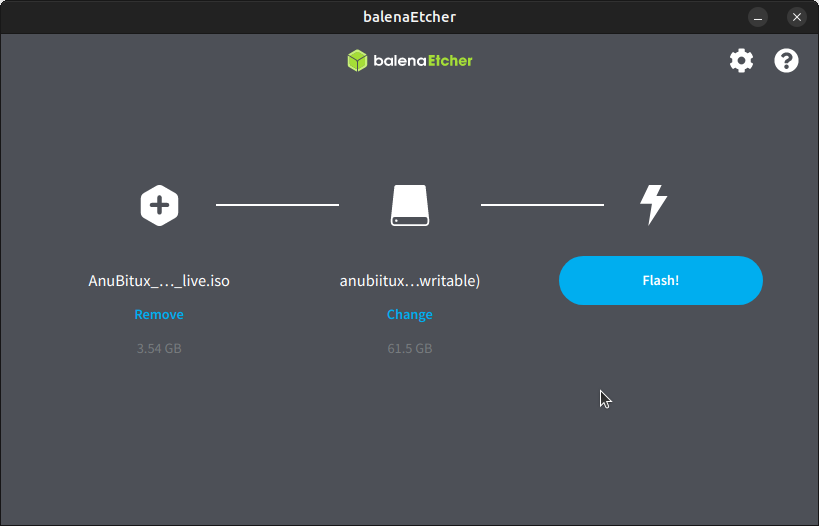
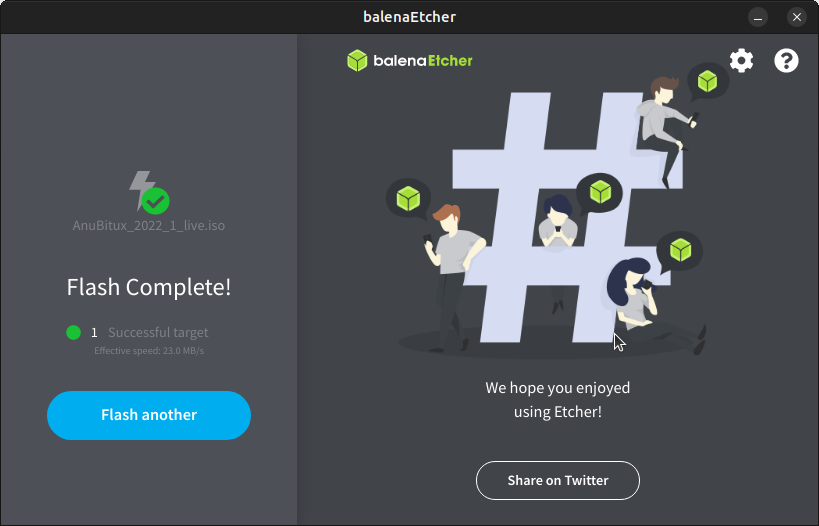
Now click on the "Flash!" button (if using Linux provide your root password) and wait until the process ends.
When finished, you can plug in the USB stick to the device you want to use with AnuBitux and turn it on.
Now you may need to enter your BIOS configuration and change the boot priority so that the USB device will be in the first position. Unless so, your device may boot your common operating system. In some cases, to change boot priority you may need to disable the secure boot features or change the boot mode settings. This procedure may be different depending on the used device. Here you can find some useful suggestions about how to do that.
AnuBitux install
This version allows you to install a permanent copy of AnuBitux. This is not what AnuBitux has been designed for because some sensitive information could be recovered or leaked. Use this version only for training and tests. To use it you may create a bootable USB stick following the same procedure described above for the AnuBitux live version. When running it, you'll find an install icon on the desktop. Click on it and follow the Ubuntu installation wizard.

You may also install it in a virtual machine like VirtualBox or VMWare Player.
VIrtualBox
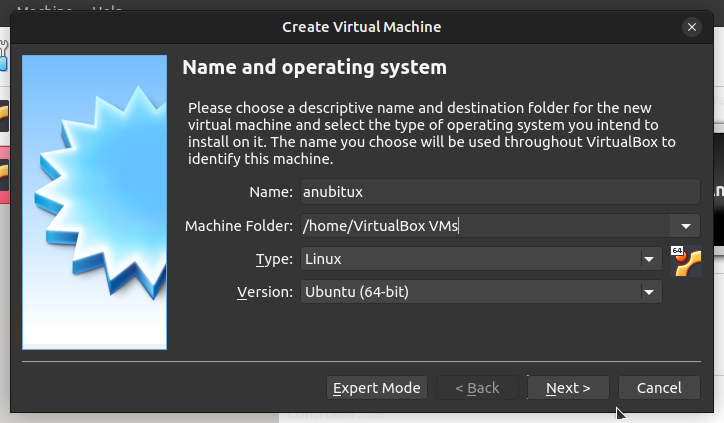
First of all create a new virtual machine (Machine -> New) and fill the form as preferred or like suggested in the following picture.
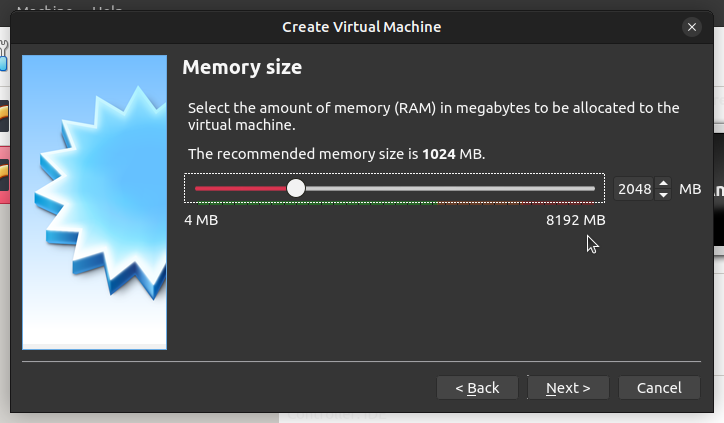
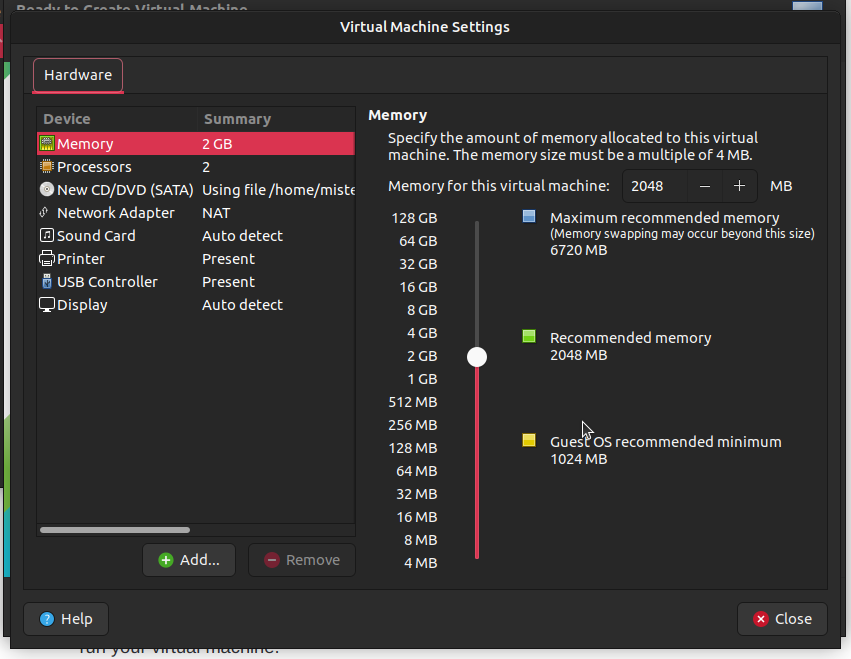
Then click on next and select the amount of RAM memory you want to assign to your virtual machine. A minumum of 2048 MB is suggested to avoid running issues.
Then click on Next, select the "Create a virtual hard disk now", choose the "VDI" format and the "Dinamically allocated" option. Then choose the maximum size of the virtual disk. A value of 20 GB should be appropriate.

At the end of this steps click on "Create".
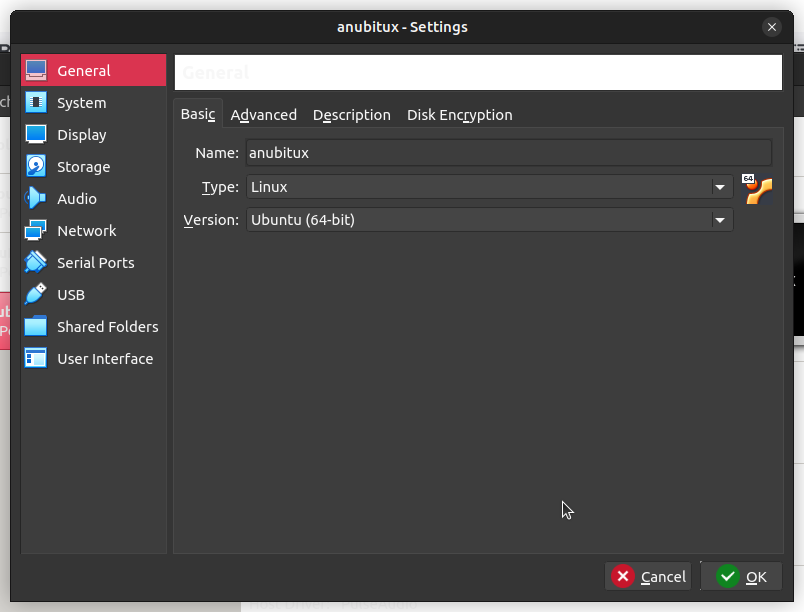
Now the new virtual machine will be in the left side list of our Virtual Box client. Select it and click on the "Settings" button.
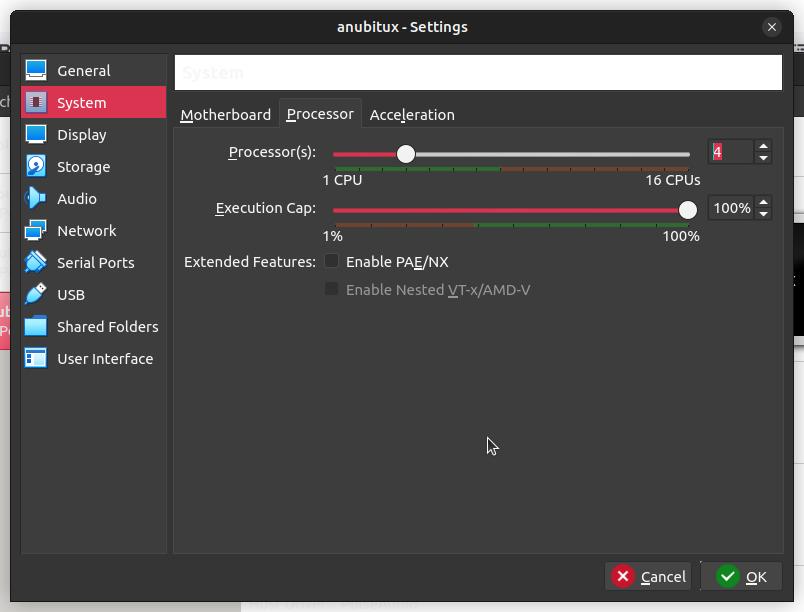
Now go to the "System" menu and to the "Processor(s)" submenu. Here you can choose how many processors you wish to assign to the virtual appliance. The correct choise depends on the used device. Make shure to remain on the green line.
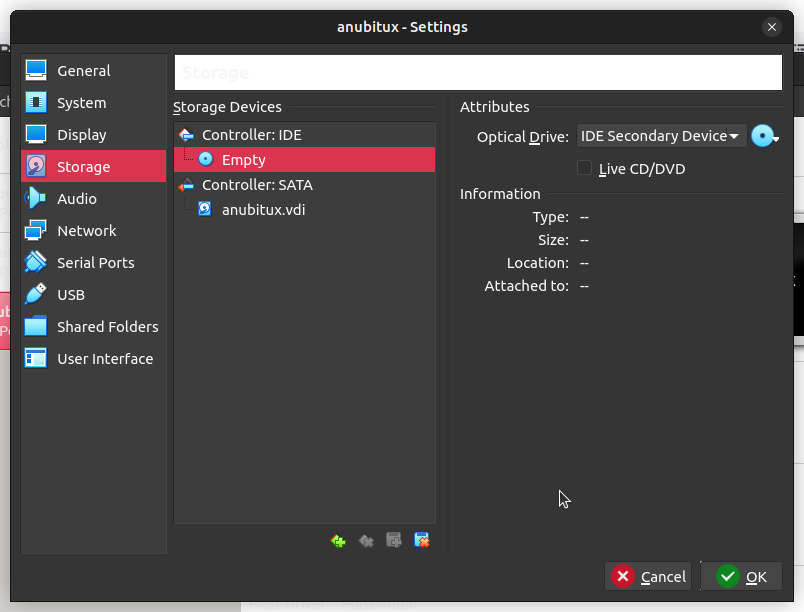
Then go to the "Storage" menu, select the disk icon with the label "Empty" and click on the other disk icon on the right part of the window. Here click on"Choose a disk file" and select the AnuBitux .iso file you want to run.
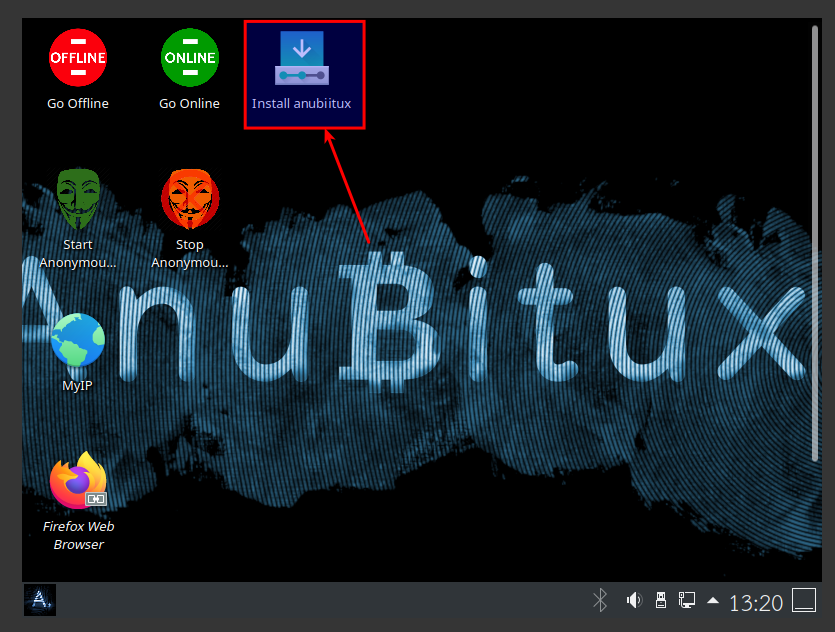
Now click on "OK" and you are ready to run your virtual machine. When running it, on the desktop you will find an "Install anubitux" icon.
Double click on it and follow the common Ubuntu installation wizard, as suggested in the official documentation.
For a better user experience, it is suggested to install the VirtualBox Extension Pack on your host system and the VirtualBox Guest Additions in your virtual machine.
VMWare Player
To install and run AnuBitux in a VMWare virtual machine, open VMWare player and click on "Create a New Virtual Machine".

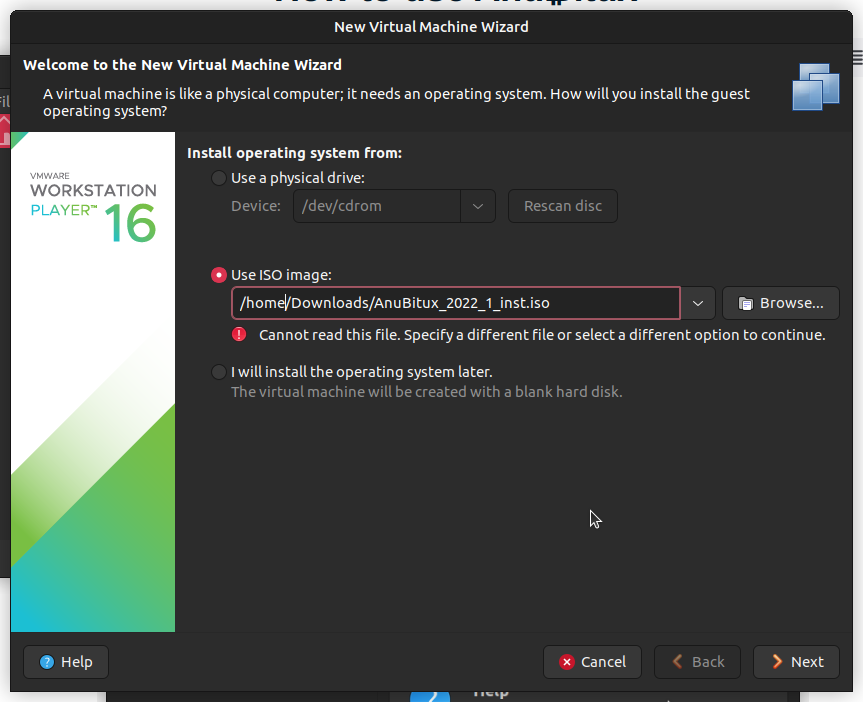
In the next window select the "Use ISO image:" option, click on "Browse..." and select the AnuBitux iso image you wish to install.
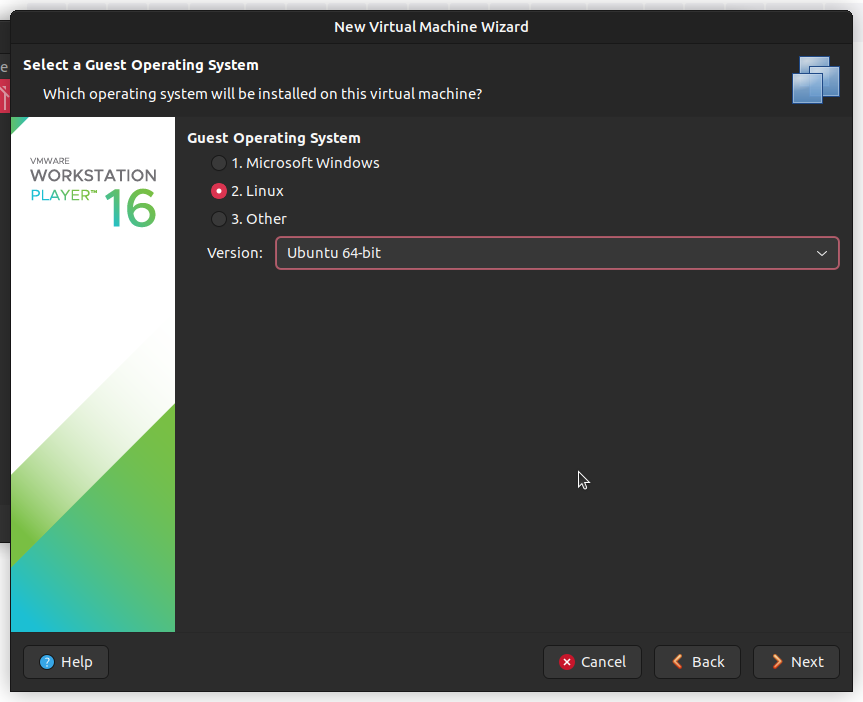
In the next window select the "Linux" option and choose "Ubuntu 64-bit" from the list.
In the next window choose a name for your virtual machine and the folder where VMWare player is going to store the files.
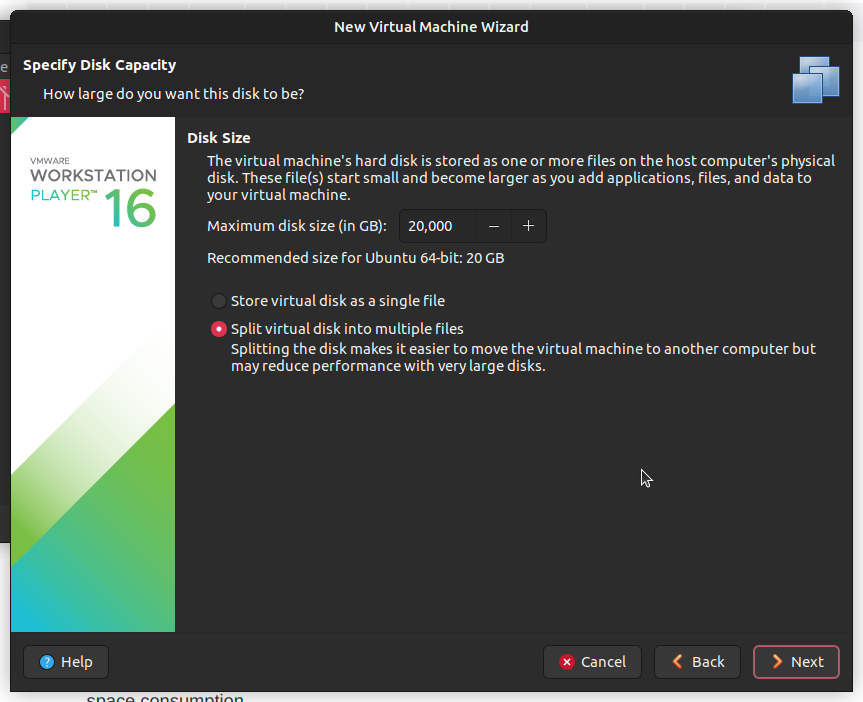
Then choose the maximum size of the virtual har disk that the virtual machine will use. Make sure to select the "Split disk into multiple files option" to avoid an excessive disk space consumption. A size of 20 GB should be appropriate for running some tests on AnuBitux and its tools.
In the next window you can click "Customize Hardware..." to change settings like the number of processors to assign to the virtual machine. Then you can click "Finish" and run your virtual machine.
Now you can start the virtual machine and click on the "Install anubitux" icon on the desktop to permanently install it in your virtual machine.

After doing that you only have to follow the Ubuntu installation wizard, as suggested in the official documentation.
Ubuntu usally has the open-vm-tools installed by default, but for a better user experience you could also install the "VMware Tools".
AnuBitux virtual machine
On the download page there is also a ready to use AnuBitux virtual machine. To use it, first of all, you need to have VIrtualBox installed. You may also install the VirtualBox Extension Pack to increase the features of your virtual machine.
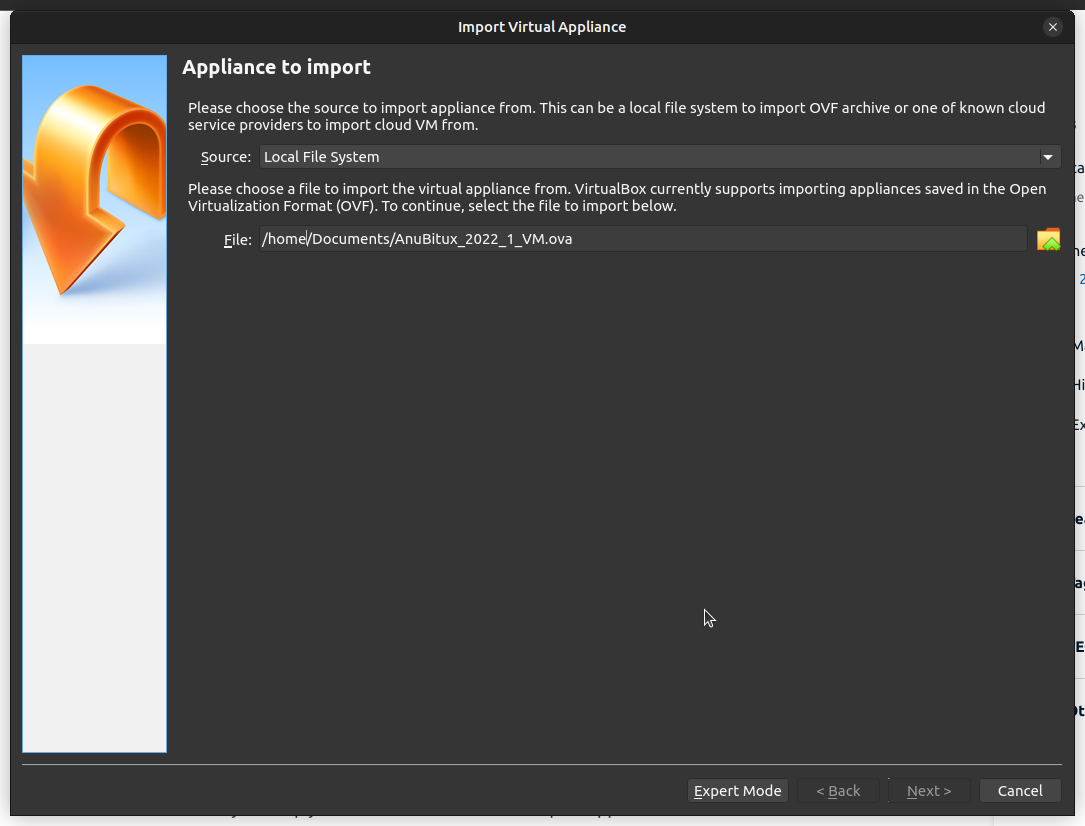
Then you simply have to click on "File" -> "Import Appliance..." and select the .ova file you have downloaded.
Then select the "Local File System" option and choose the .ova file to import.
Then simply click on "Next >" and on "Import".
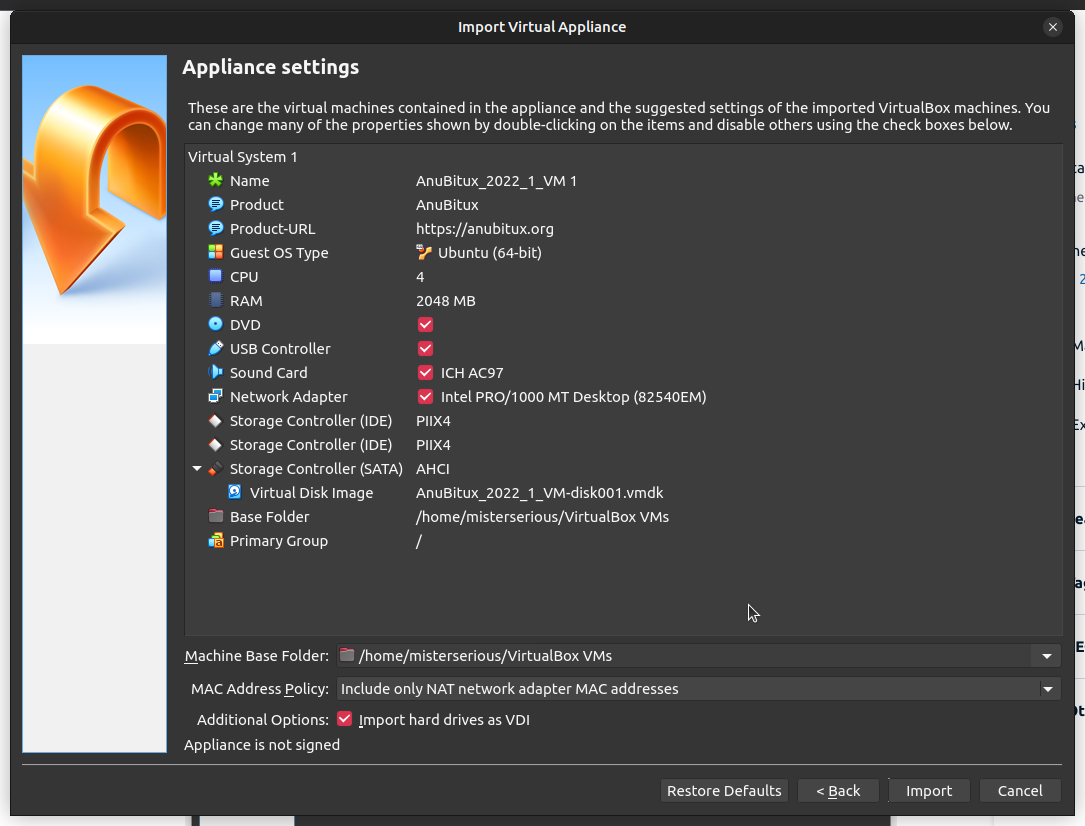
Then, when the import process is complete, the virtual machine will appera in the left side of the VirtualBox client, where al the virtual appliances are listed. Now you can start AnuBitux or click on the "Settings" button to customize the hardware assigned to it.