
Capture and review network traffic with AnuBitux

When handling our cryptocurrencies, we feel more comfortable being offline but, sometimes, we can't perform operations without using an internet connection. In these cases, we are always afraid that some sensible information could be leaked. With AnuBitux we have a lot of countermeasures, like a network monitor on the lower right side of our screen and a desktop shortcut that disables all the communication features. If we want to perform some additional checks, even to verify if AnuBitux is working properly, we can use Wireshark, a tool that captures all the incoming and outgoing network traffic and allows us to review it with a lot of powerful features like filters and streams reconstruction.
First steps
We can find wireshark in the Useful Tools menu. If we want to run it with root privileges, we can launch it from our terminal typing
sudo wireshark
Remember that in AnuBitux the default root password is set to anubitux.
Now we can choose which network interface we want packets to be captured and start the acquisition by clicking on the shark's fin button.

Decrypting encrypted network traffic
Nowadays most of the network traffic is encrypted with TLS, so even if we capture it, we won't be able to read it. To see what's flowing through our Internet connection, we need to configure a pre-master secret key.
To prepare it, we need to set up an environment variable, setting up a file that stores handshakes and that can be used by Wireshark to decrypt network traffic.
Let's create an empty text file, for instance in our Documents folder and name it keylogfile.txt. Now we need to edit the SSLKEYLOGFILE environment variable so that the information we need will be stored in this file. We can do that by opening our terminal and typing
nano .bashrc
and adding this line at the end of the file
export SSLKEYLOGFILE=/home/anubitux/Documents/keylogfile.txt
Then we can close the nano text editor pressing Ctrl+X and saving the modified file (without renaming it).
Now we need to restart our Terminal so that it takes effect. To check if it worked, we can type
echo $SSLKEYLOGFILE

At this point we have to set up Wireshark to use the content of this file to decrypt the captured network traffic. To do that we have to open Wireshark, go to Edit and click on Preferences, then under the protocols list select TLS and, clicking on the Browse button, provide the keylogfile we created.
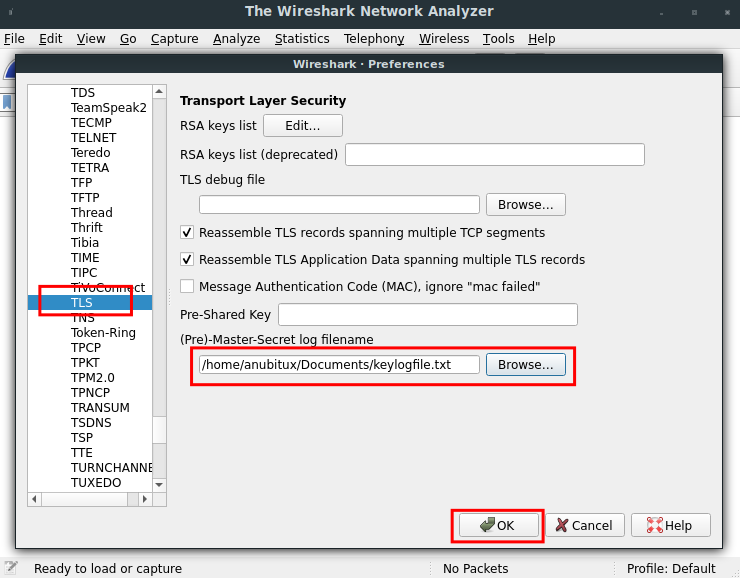
Now Wireshark will be able to decrypt network traffic and show it in plain text.
Capturing traffic
Finally, we can start capturing our traffic by clicking on the shark's fin button. To see something going on, let's start the Firefox browser (it may be necessary to start it from the Terminal, to make sure it stores keys in the keylogfile.txt file).
Then we can visit some websites that use HTTPS, like anubitux.org and iancoleman.io. After browsing some pages we can stop the network capture and review it.
In the below picture, we can see an example with a captured TLS packet.
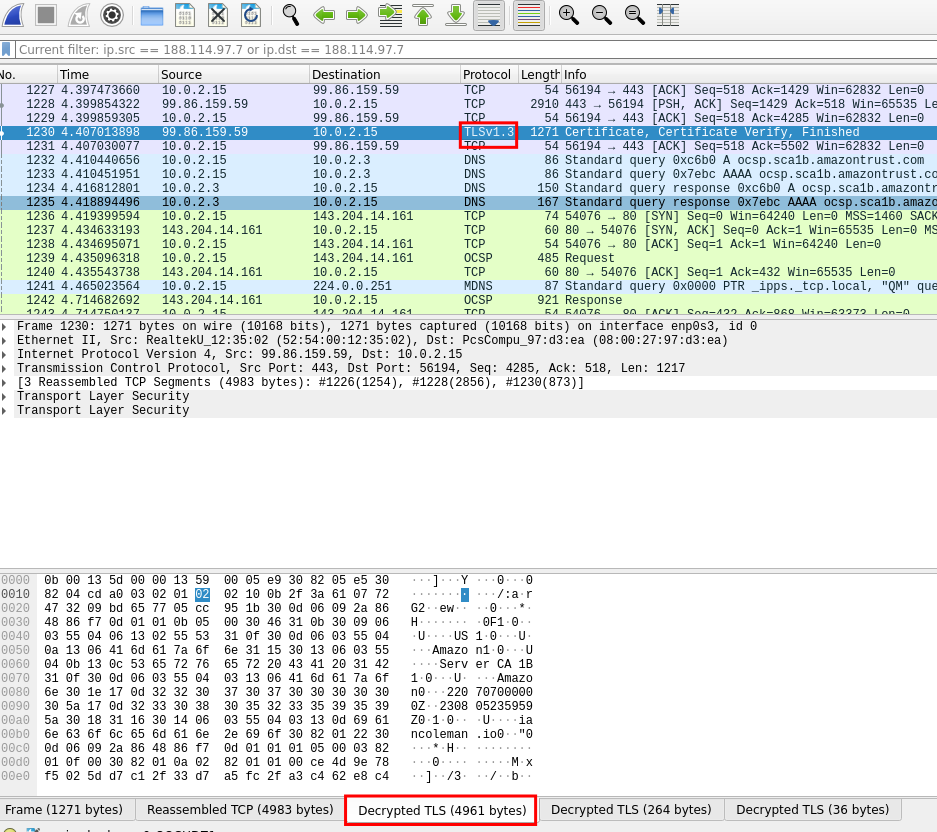
To see its content we need to click on the proper button in the lower part of the user interface. These buttons would not be available without setting up the key log file as we did before.
In this case, it is a packet related to the HTTPS certificate verification process. With most of the websites, even if packets are unencrypted, we won't see the plain text because the information are sent in gzip format. Sometimes Wireshark will be able to see it, providing us another button to see the uncompressed content of packets.

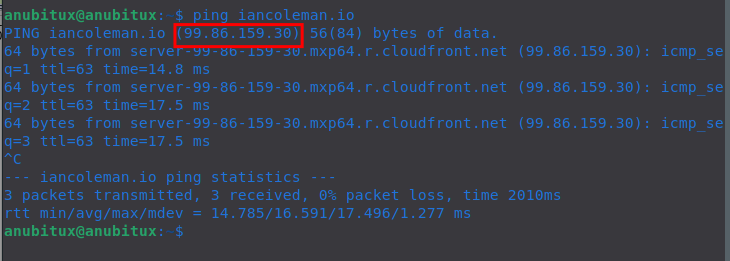
If we are interested in packets we exchanged with a specific website, like iancoleman.io, we can filter our list knowing its IP address. To check it out we can ping it, as seen above.
Now we can set up filters in the proper box, based on the IP address we have found. To see both incoming and outgoing traffic the syntax is
ip.src == 99.86.159.30 or ip.dst == 99.86.159.30
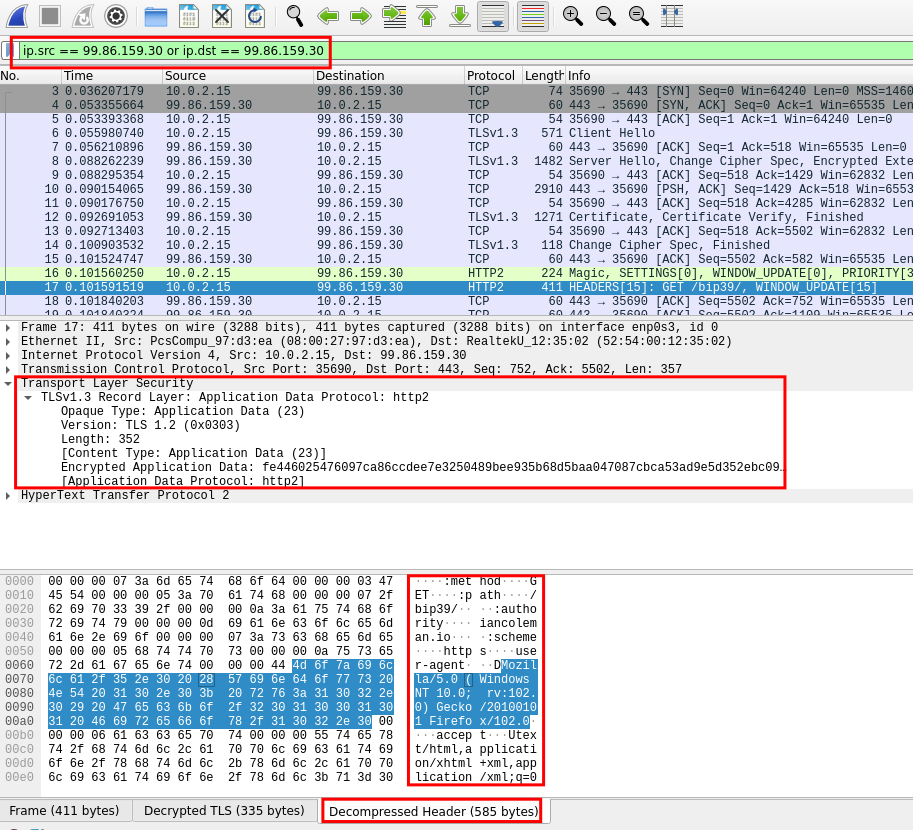
In the picture we can see a packet we have sent to iancoleman.io's website with the details of our browser. It was an encrypted package and we can see its content only thanks to the setup we have made.
Final thoughts
Wireshark is a very powerful tool to analyze network traffic. In this post, we have seen only a few examples of how to use it but it can be applied in a lot of different situations, not only for analyzing network activity but also for penetration testing and security audits. It also requires very good skills to be used properly, since it collects thousands of packets every few seconds and most of them seem to be meaningless without knowing what is going on. There are a lot of guides and tutorials online about how to use it, even on the official website.